Best Practices--Canvas Modules and Pages
Designing your Course with Modules and Pages
Designing your Canvas course can be done using Modules, Pages, or a combination of both.
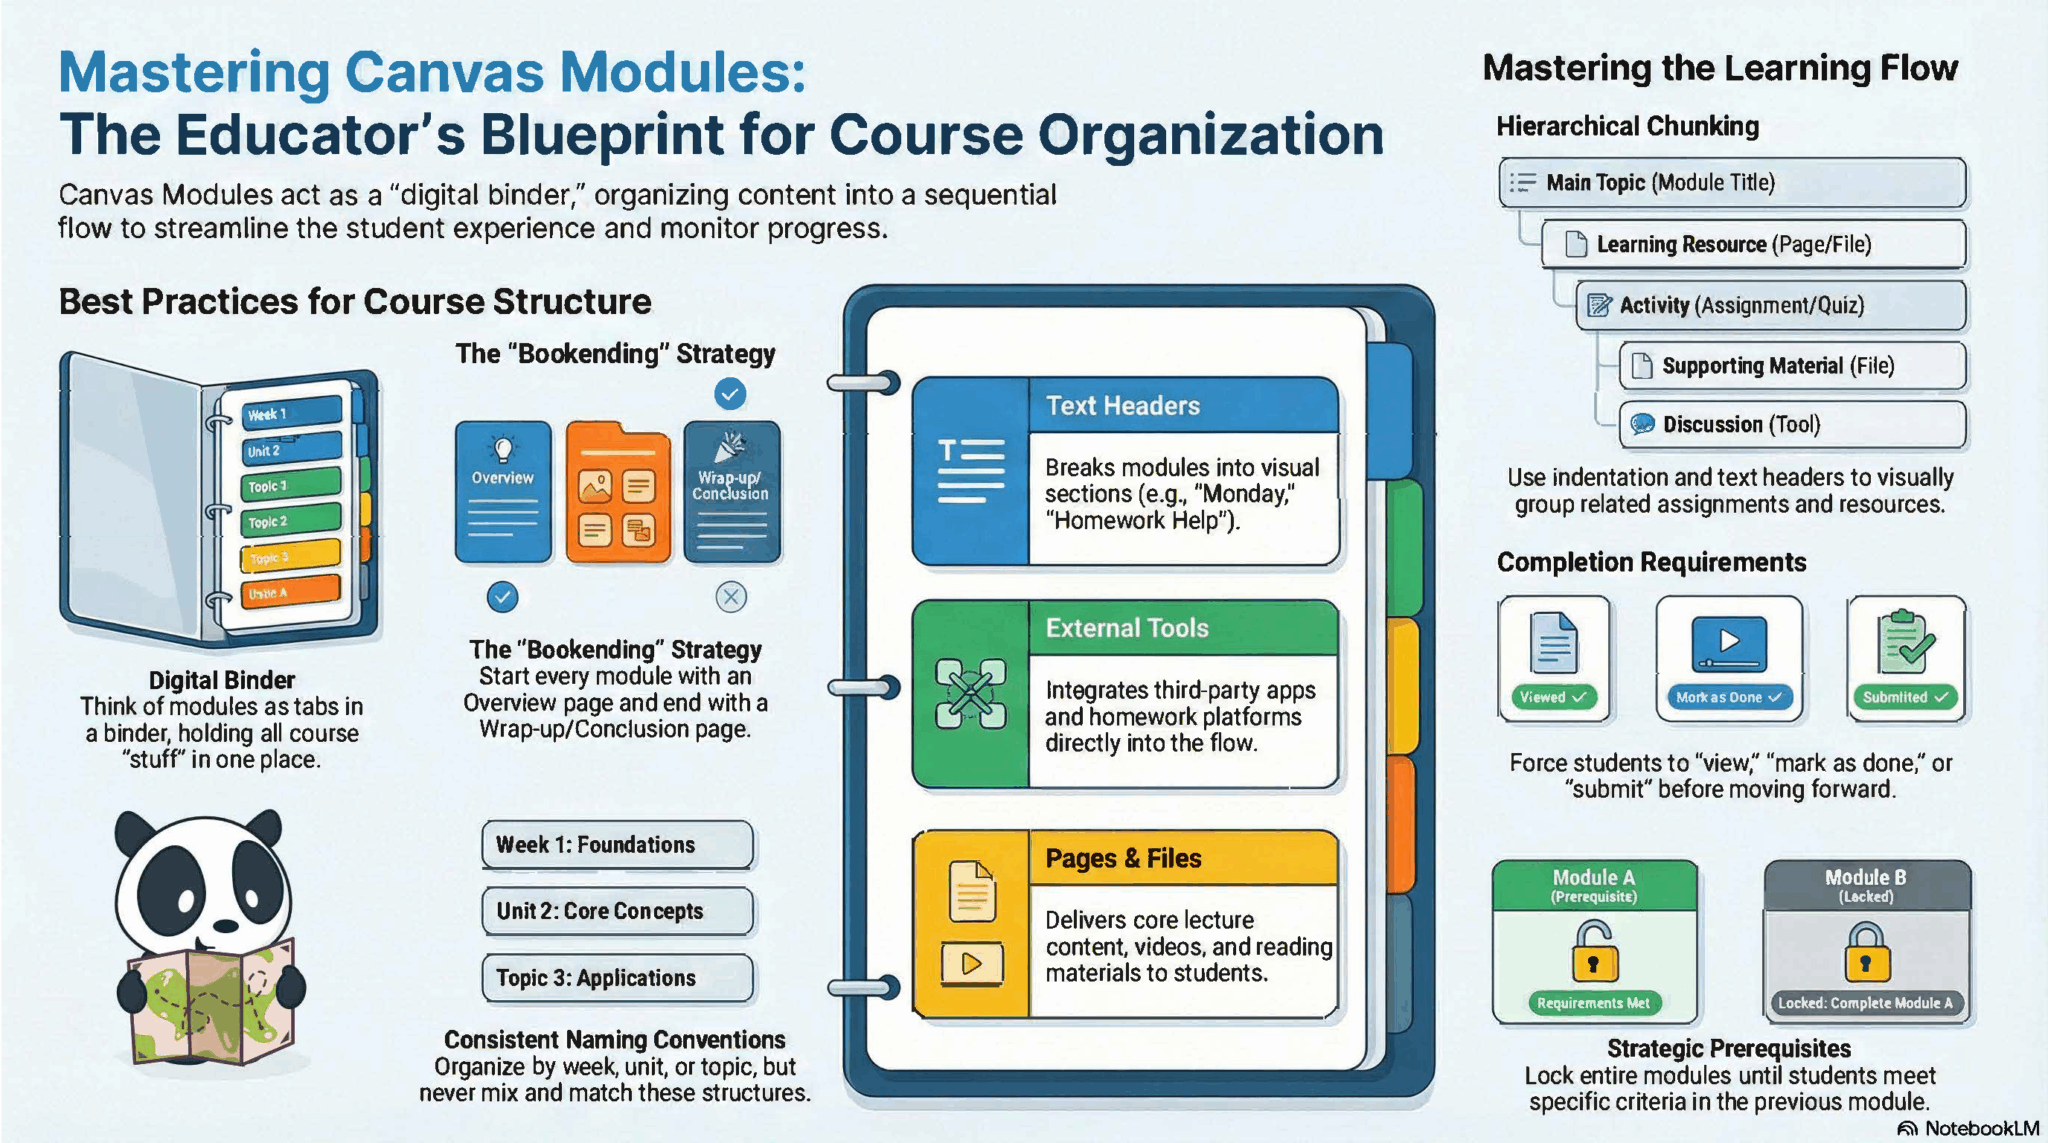
Organizing with Modules
Modules serve as the structural backbone of your Canvas course, allowing you to arrange content by week, unit, or specific learning objective. Think of a module as a guided pathway where you can group files, assignments, and activities into a single, cohesive flow. For a deep dive into the technical setup, explore the Canvas Instructor Guide on Modules.
Advantages
- Centralized Access: Gives students a “one-stop shop” for every resource needed for a specific unit or week.
- Clear Roadmap: Acts as a digital Table of Contents, providing a logical, step-by-step progression through the course.
- Controlled Pacing: You can set “Lock Until” dates to prevent students from jumping too far ahead.
- Mastery Paths: Set prerequisites that require students to finish one task before the next becomes available.
- Progress Monitoring: Easily see how far each student has advanced through a specific sequence of materials.
Limitations
- Visual Limits: Multimedia like videos and images aren’t visible on the module list; students must click into an item to see them.
- Plain Text: You cannot use bolding, colors, or italics for item titles within the module view.
- Lack of Narrative: Modules are lists of items; they don’t allow you to explain *why* a reading is important or how items connect.
- Static Feel: For a more immersive or “web-page” feel with context and storytelling, **Pages** are a better tool.
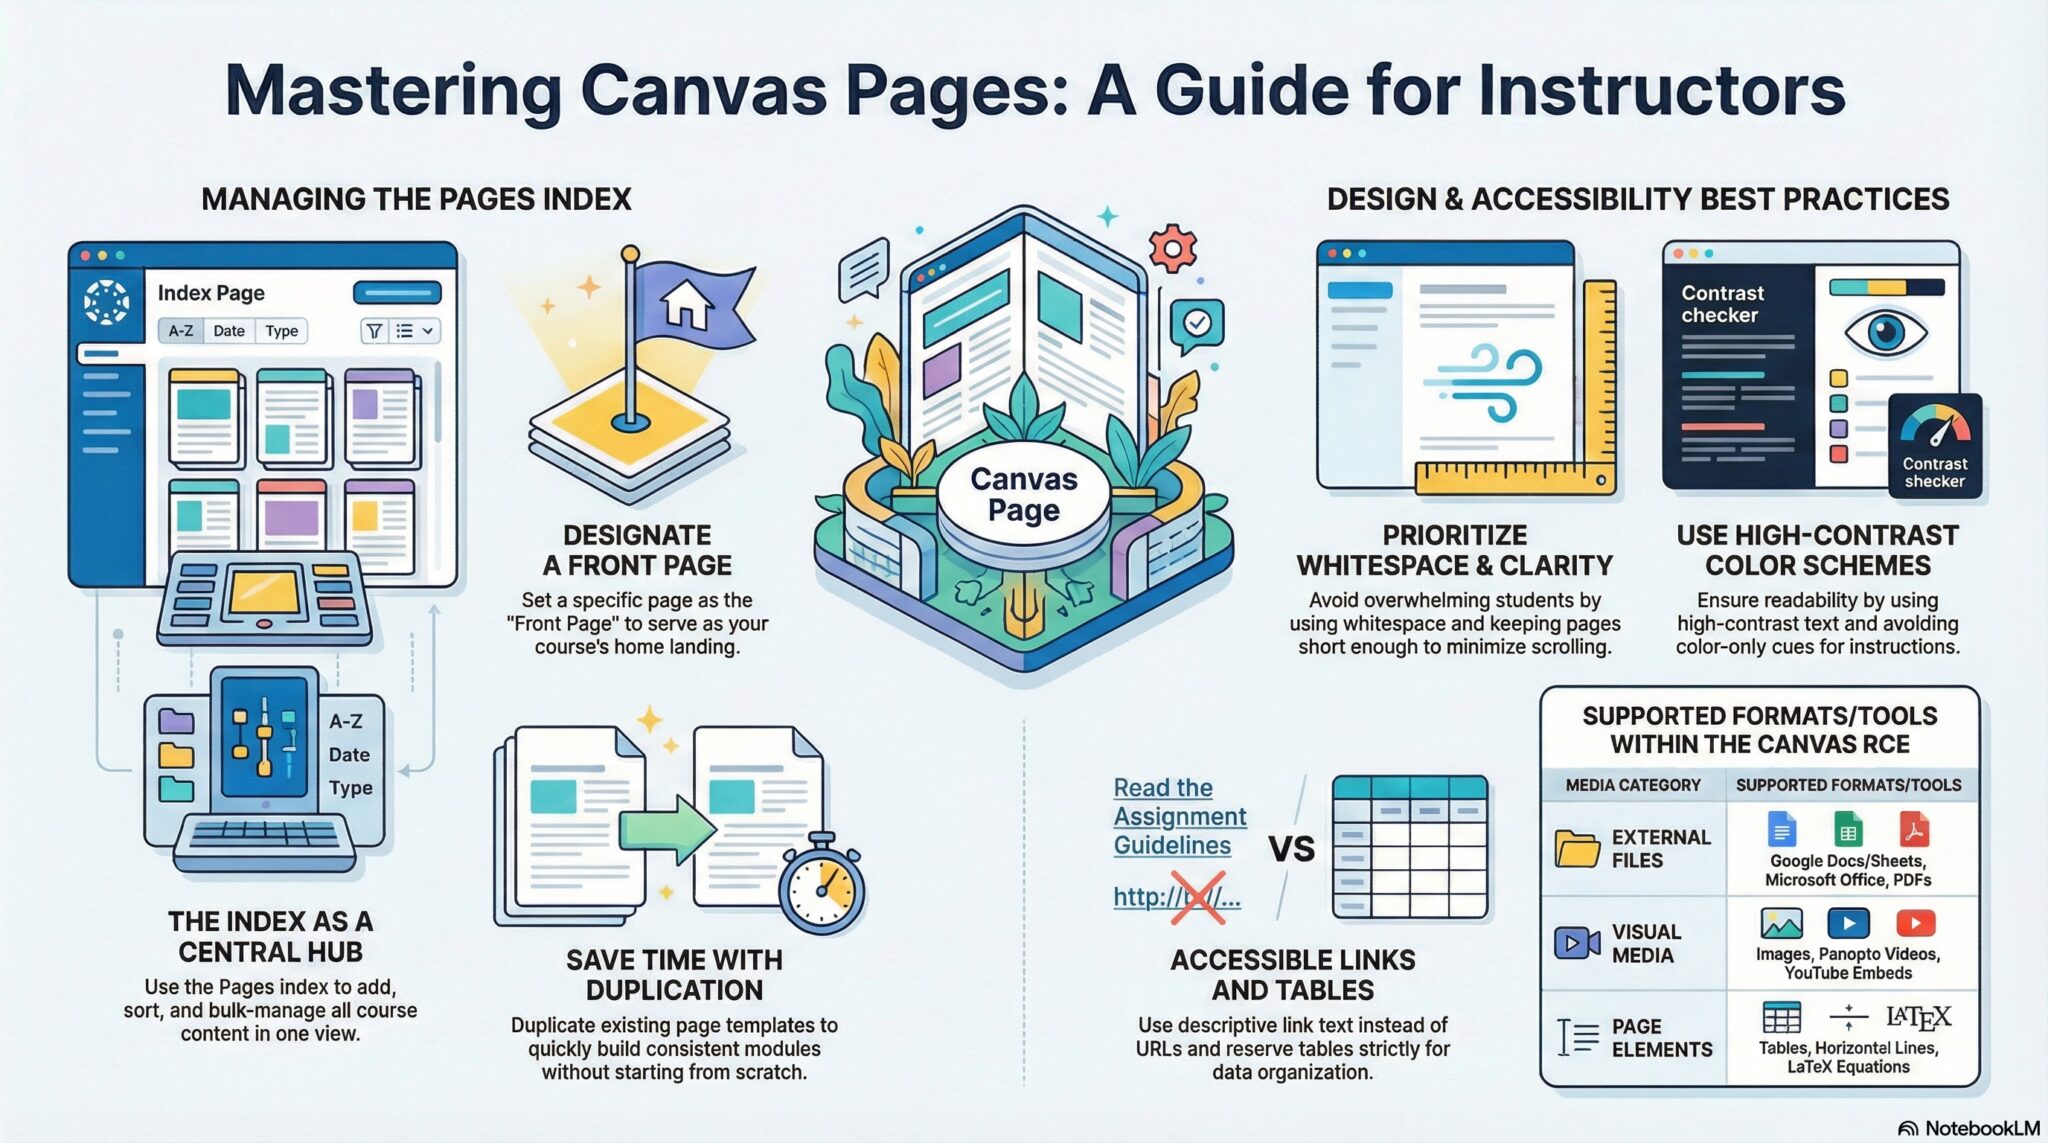
Enhancing Content with Pages
While Modules provide the structure, Pages provide the substance. Think of a Page as a custom website within your course where you can curate a rich learning experience. Instead of just listing a file, a Page allows you to introduce that file, embed a video lecture right next to it, and provide the “why” behind the lesson. For technical guidance, see the Canvas Instructor Guide on Pages.
Advantages
- Dynamic Presentation: Offers a much higher level of visual appeal and professional “polish” compared to standard module lists.
- Contextual Learning: Allows you to provide a narrative—explaining learning objectives and instructions alongside your resources.
- Multimedia Integration: You can embed videos, images, and audio directly on the page so students can engage without extra clicks.
- Styling Tools: Full use of the Rich Content Editor (bold, headers, colors) helps highlight the most important information.
- Collaborative Potential: Pages can be set to “Student Editable,” turning them into a wiki-style space for group projects or sign-up sheets.
Limitations
- Manual Scheduling: Unlike Modules, individual Pages cannot be set to “unlock” automatically on a specific date.
- Navigation Complexity: The “Pages” tab is organized alphabetically by default, which can be messy. It is best to link Pages within a Module rather than having students use the Pages tab.
- No Built-in Sequence: Pages don’t have “Next” and “Previous” buttons unless they are placed inside a Module.
Integrating Modules and Pages
The most effective course designs typically don’t choose one over the other; instead, they blend both tools to create a seamless learning environment. By nesting descriptive Pages within the structured framework of Modules, you provide students with the “best of both worlds”—a clear, linear path that also includes the necessary context and engagement for each lesson.
Optimization Strategies
- Establish a Welcoming Entry Point:
Your Course Home Page acts as the digital “front door” to your classroom. We recommend designing a landing page that immediately grounds the student. High-quality home pages often include a brief welcome, instructor contact details, a “How to Start” guide, and links to technical support. This reduces student anxiety and sets a professional tone from day one.Quick Guide: Launching Your Home Page
- Build: Create your custom Page with a welcome message and syllabus links.
- Publish: Ensure the page is published (green checkmark), or it won’t be visible in settings.
- Designate: In your Pages list, select the “vertical ellipses” (three dots) and Set as Front Page.
- Activate: Go to your Home tab and click “Choose Home Page” on the right sidebar to finalize the view.
- Simplify the Sidebar:
Too many visible links can overwhelm students. Curate your navigation menu by hiding unused tabs (like “Files” or “Pages”). Directing students through a single entry point—like “Modules”—ensures they don’t miss important instructions. - Prioritize Inclusive Design:
Accessibility is essential for student success. Use the Accessibility Checker (the person icon in the Rich Content Editor) to automatically scan your Pages, Assignments, and Quizzes for proper heading structures and image descriptions.
If you need any help with Modules or Pages, you can book a one-on-one session via Zoom or in person with Kirstie Knighton, Instructional Technology Specialist.